Connect your Substack
Connecting your Substack account is required to publish and sync notes. This is done during onboarding when you first sign up.
StackSweller connects using your Substack session cookie (substack.sid) — the token that keeps you logged in to substack.com in your browser. Substack has no “sign in with Substack” option for third-party apps, so this is the only way to connect. We never need your Substack email or password, and we work out your Substack handle and publications from the cookie, so there is nothing else to fill in.
With the Chrome extension (recommended)
On a desktop Chromium browser — Chrome, Edge, Brave, Arc and similar — onboarding offers the StackSweller extension. It connects the Substack account that is logged in within that browser to the StackSweller account that is logged in within that browser, so you never copy anything by hand.
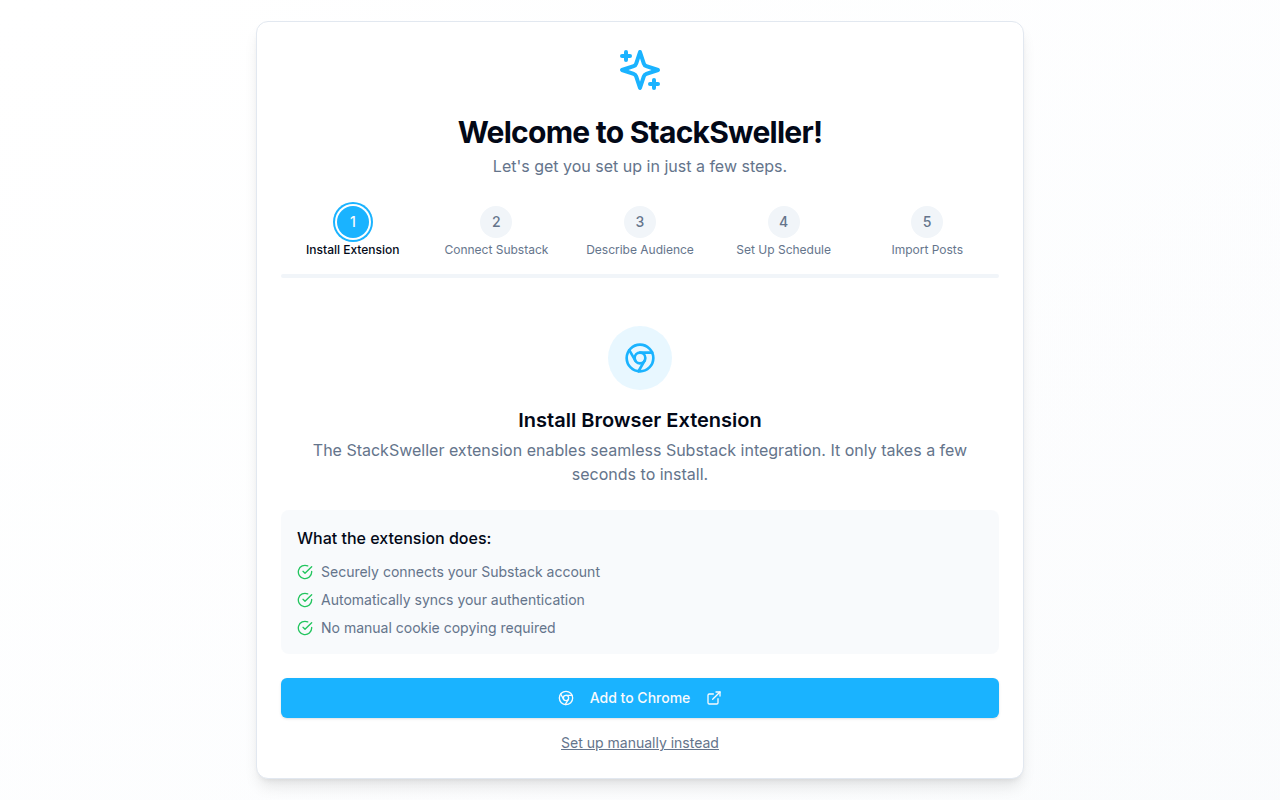
- Click Add to Chrome in onboarding and install the extension
- Open substack.com in a new tab and make sure you’re logged in to the account you want to connect
- Click the StackSweller extension icon in your browser toolbar
- Click Connect Account in the extension popup
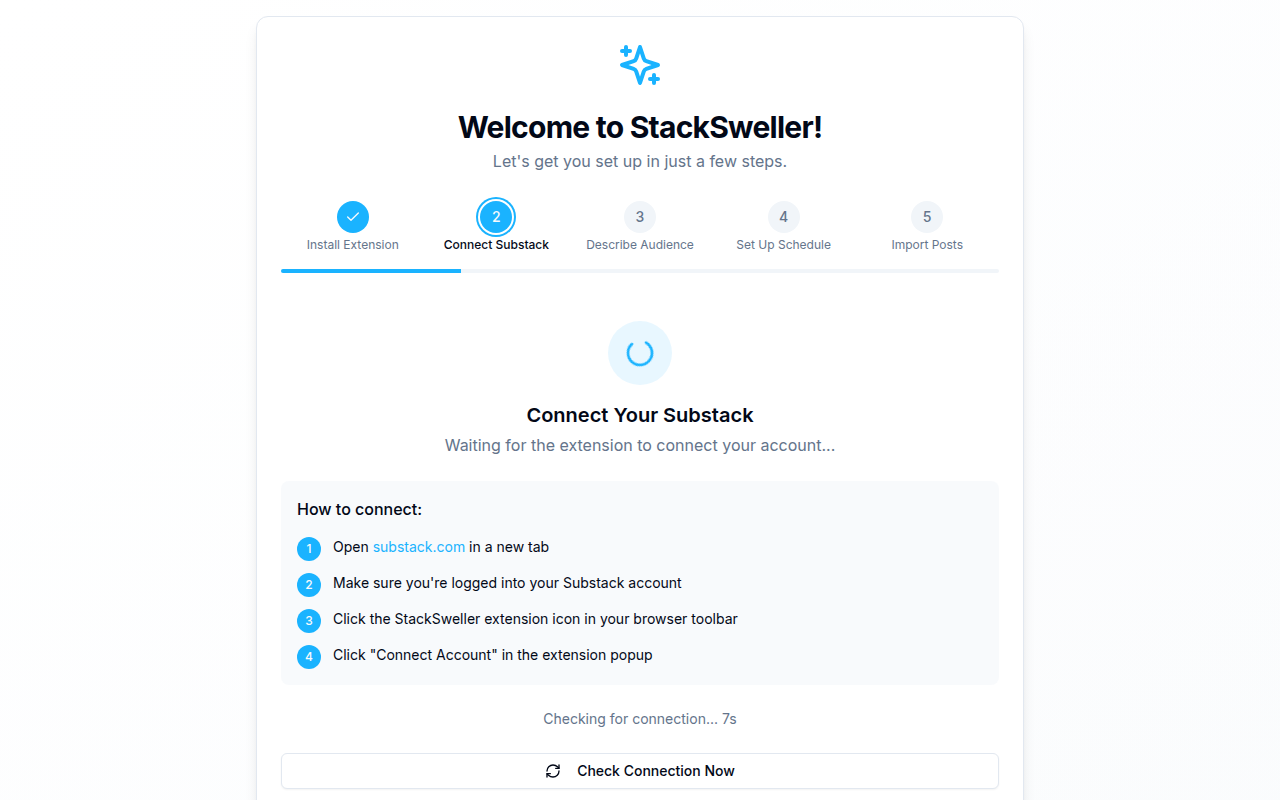
Onboarding detects the connection and shows the handle it connected as.
Manually
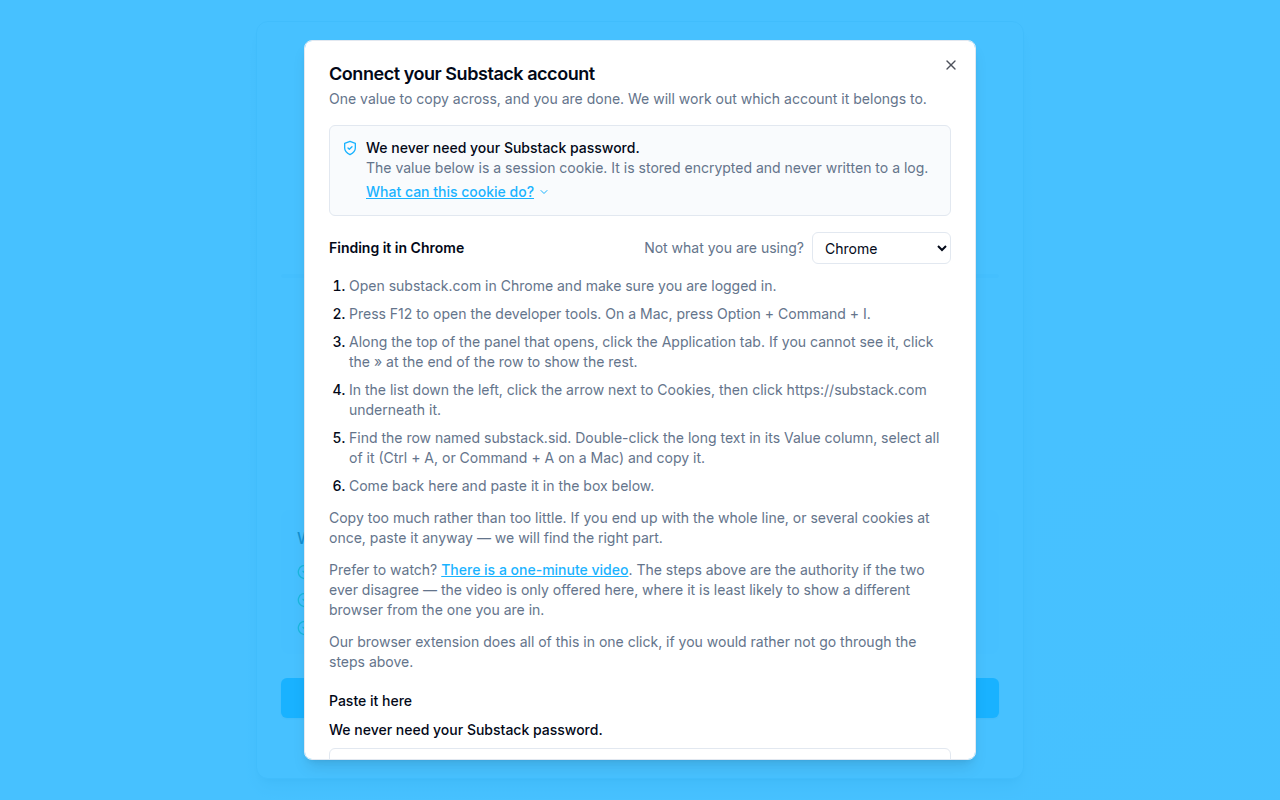
On Firefox and Safari, or if you’d rather not install the extension, choose manual setup. StackSweller shows step-by-step instructions for your browser to open its developer tools, find the substack.sid cookie for substack.com, copy its value and paste it in. Copying too much is fine — paste the whole cookie line and we’ll pick out the right part.
ℹ️ Note
Phones and tablets have no developer tools and can’t run the extension, so connecting needs a laptop or desktop. It only has to be done once; everything else works on mobile afterwards.
Is the cookie safe to share?
- It is not your password. It can’t be used to recover or change your password.
- It is a live login to your Substack account. We use it to publish and schedule the notes you approve and to read your own posts and notes. We store it encrypted and never write it to a log.
- You can cut it off at any time. Press Disconnect Substack in Settings and we delete it (see Disconnect or switch accounts). To cut it off at the Substack end as well, sign out of Substack everywhere from your Substack account settings. That invalidates the cookie immediately, including our copy.
When the connection expires
Substack sessions expire from time to time. When yours does, a red Substack Connection Expired card appears in Settings, and scheduled notes won’t publish until you reconnect.
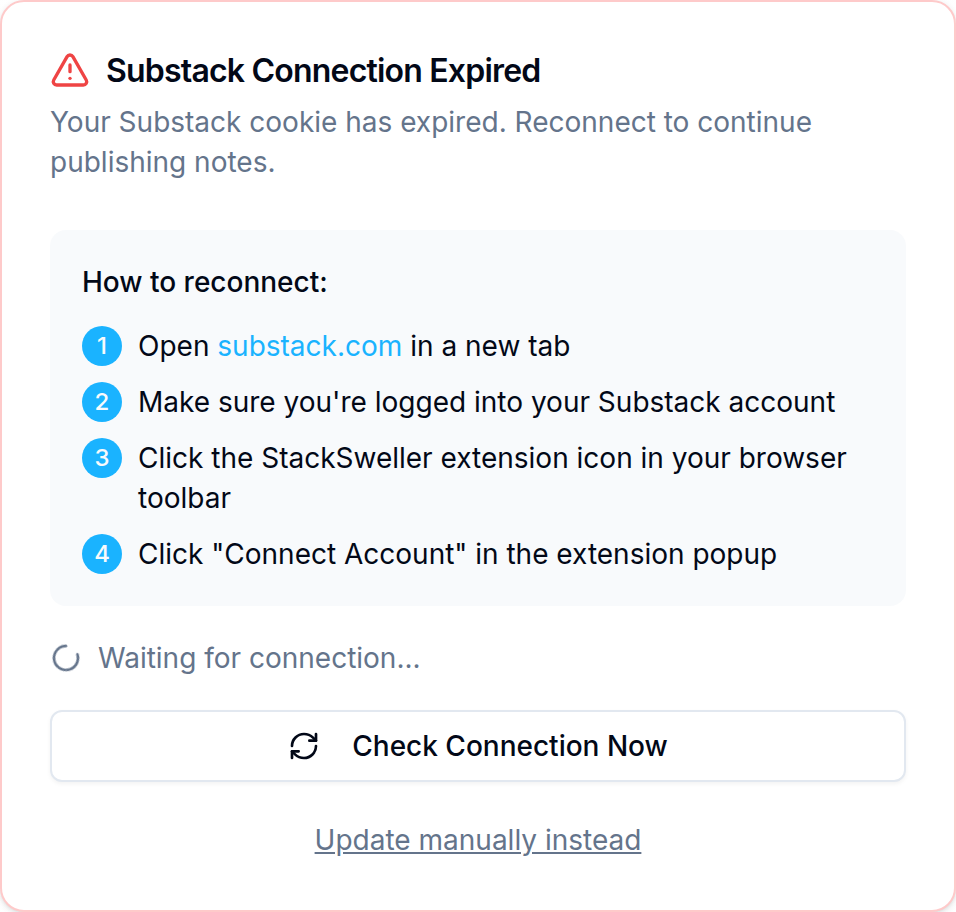
- With the extension: open substack.com, make sure you’re logged in, then click the extension icon and Connect Account. Click Check Connection Now if the card doesn’t update on its own.
- Manually: click Update manually instead, paste a fresh
substack.sidvalue into New Substack Cookie, and click Update Cookie.
Disconnect or switch accounts
The Substack Account card in Settings shows which account is connected (“Connected as @handle”).
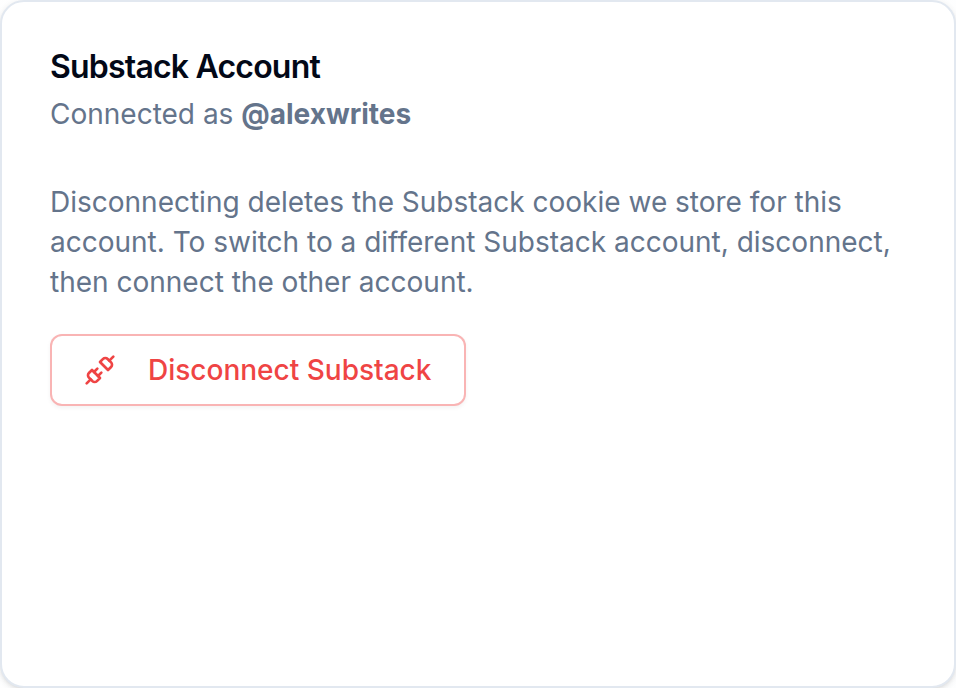
- Click Disconnect Substack
- Read the confirmation and click Yes, disconnect Substack (or Keep connected to back out)
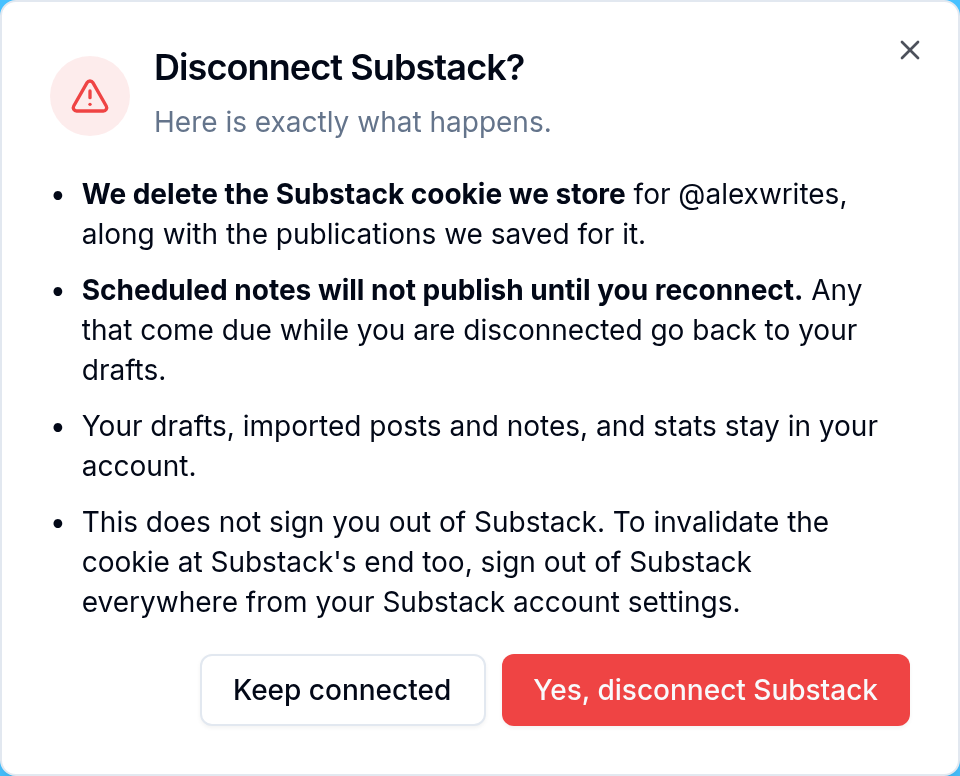
What happens:
- We delete the Substack cookie we store, along with the publications we saved for that account.
- Scheduled notes won’t publish until you reconnect. Any that come due while you’re disconnected go back to your drafts.
- Your drafts, imported posts and notes, and stats stay in your StackSweller account.
- It does not sign you out of Substack. To invalidate the cookie at Substack’s end too, sign out of Substack everywhere from your Substack account settings.
You’re then taken back to the connect step, where you can connect the same account again or a different one. To switch to a different Substack account, disconnect first, then connect from a browser where the other account is logged in to Substack.
Publications
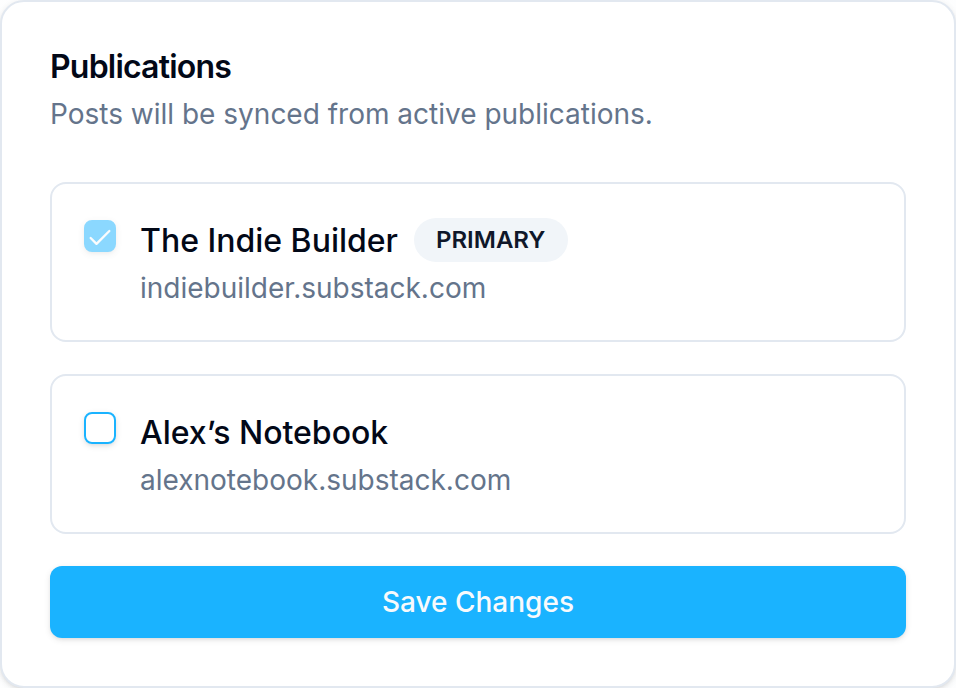
If your Substack account writes for more than one publication, the Publications card in Settings lists them all. Posts are synced from every publication you leave active there. Notes always publish from your Substack profile, not from a publication.
Settings
Your account settings are available at Settings (bottom of the sidebar).
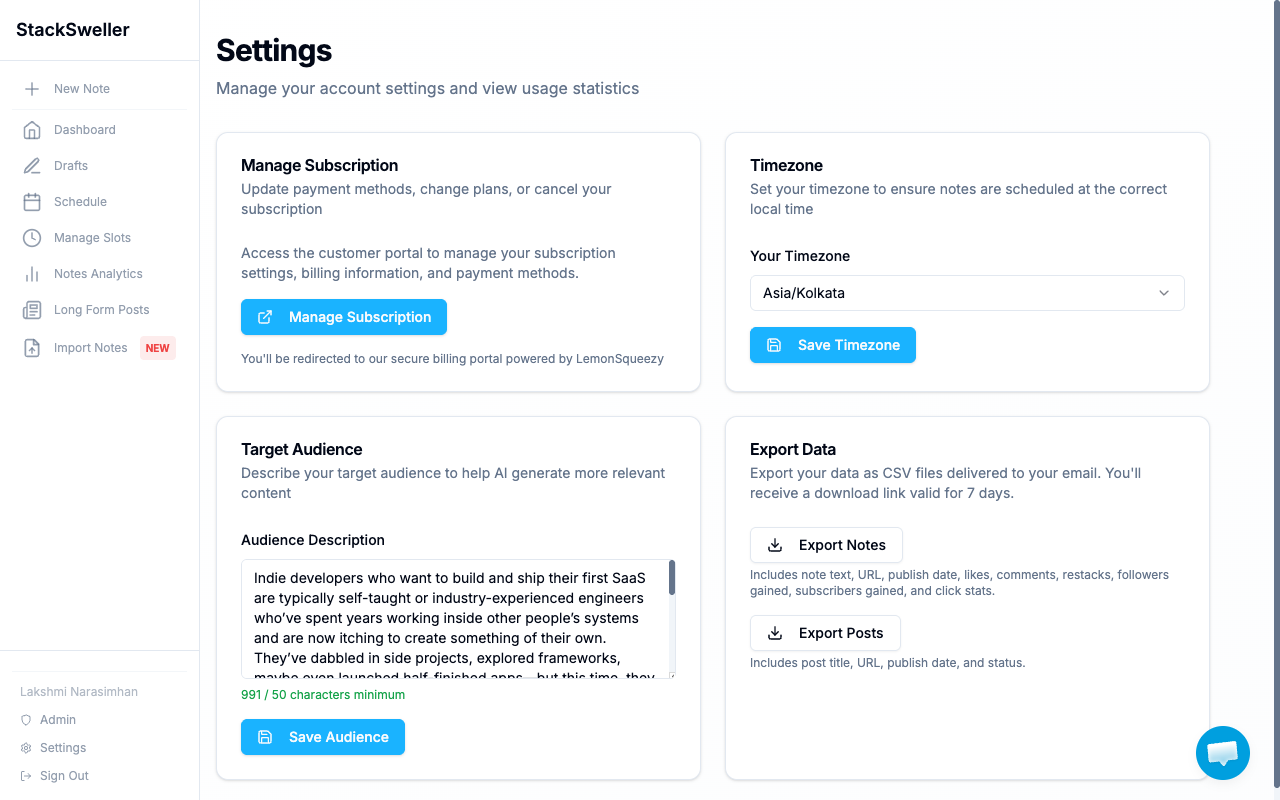
The Settings page includes:
| Section | What it does |
|---|---|
| Manage Subscription | Upgrade, downgrade, or cancel via the billing portal |
| Timezone | Set your local timezone for accurate scheduling |
| Target Audience | Describe your audience to improve AI-generated content |
| Substack Account | See which Substack account is connected, and disconnect it |
| Publications | Choose which of your Substack publications posts are synced from |
| API Keys | Create keys for MCP integrations such as Claude Code |
| Email Notifications | Choose which emails you receive from StackSweller |
| Export Data | Download your notes and posts as CSV |
Set your timezone
- Go to Settings
- Find the Timezone section
- Select your timezone from the dropdown
- Click Save Timezone
⚠️ Warning
Set your timezone before creating scheduling slots. Slot times are always interpreted in your configured timezone.
Target audience description
The audience description is sent to Claude with every AI generation request. The more specific it is, the better the AI output matches your writing style and audience expectations.
Example:
“Tech-savvy entrepreneurs and startup founders interested in AI, productivity tools, and building SaaS products. They value practical advice and actionable insights.”